Tri Point Flooring

Fast Hardwood Flooring Installation & Beautiful Hardwood Floor Refinishing

Common Mistakes to Avoid When Installing Hardwood Floors

Common Mistakes to Avoid When Installing Hardwood Floors 2560 1707 Roberto

Are you considering installing hardwood floors in your home? It can be a beautiful and durable flooring option that adds value to your property. However, without proper installation, you could end up with a costly and frustrating mistake. In this article, we’ll discuss the most common mistakes to avoid when installing hardwood floors and provide you with expert tips and guidance to help you achieve a flawless installation.

Common Mistakes to Avoid When Installing Hardwood Floors

1. Not Measuring the Space Correctly

When it comes to measuring the space, precision is key. You need to accurately measure the length and width of the room, taking into account any irregularities such as alcoves or closets.

It’s also important to measure the height of the space, including any doorways or transitions, to ensure that your hardwood flooring will fit properly.

By not measuring the space correctly, you may end up with flooring that doesn’t fit properly or leaves unsightly gaps at the edges. This not only compromises the aesthetics of your floor but can also affect its durability and longevity. Ill-fitting flooring can lead to issues such as warping, buckling, or uneven wear over time.

2. Choosing the Wrong Type of Hardwood Flooring

One mistake that many people make is not considering the different types of hardwood available. There are various species of hardwood, such as oak, maple, and walnut, each with its own unique characteristics and appearance. It’s essential to research and understand the qualities of each type of wood to ensure it aligns with your desired aesthetic and performance requirements.

Overlooking the different finishes available can also lead to disappointment with the final result. Hardwood floors can be finished with different coatings, such as oil-based or water-based polyurethane, which can affect the appearance, maintenance, and durability of the floor. Each finish has its own pros and cons, so it’s important to consider factors such as ease of maintenance, desired sheen level, and the level of protection needed.

3. Skipping the Acclimation Process

When hardwood flooring is manufactured, it is typically stored in a controlled environment where the temperature and humidity levels are carefully regulated. However, the conditions in the room where the flooring will be installed may be different. If the hardwood flooring is not given enough time to acclimate to the new environment, it can lead to a variety of problems down the line.

Skipping the acclimation process can result in issues such as warping, buckling, or gaps in the flooring. This is because wood is a natural material that expands and contracts with changes in temperature and humidity. If the flooring is not allowed to adjust to the room’s conditions, it may expand or contract after installation, causing these problems.

4. Not Preparing the Subfloor Properly

Before installing hardwood floors, it is essential to ensure that the subfloor is clean, dry, and level. Any dirt, debris, or moisture on the subfloor can affect the adhesion and stability of the hardwood planks. Therefore, it is vital to thoroughly clean the subfloor, removing any dust, dirt, or loose particles. Additionally, if there are any signs of moisture or dampness, it is crucial to address the issue before proceeding with the installation.

Furthermore, it is important to check the levelness of the subfloor. Uneven subfloors can cause the hardwood planks to warp or buckle over time. To ensure a level surface, you can use a straightedge or a laser level to identify any high or low spots. If necessary, you may need to use a leveling compound to correct any uneven areas.

5. Neglecting to Use Moisture Barriers

Moisture barriers act as a protective layer between the subfloor and the hardwood flooring. They are typically made of materials like plastic or asphalt felt paper that inhibit moisture from passing through. By installing a moisture barrier, you create a barrier that prevents moisture from reaching the hardwood planks.

Neglecting to use moisture barriers can result in costly damage to your hardwood floors. It is a crucial step in the installation process that should not be overlooked. By taking the time to install a moisture barrier correctly, you can protect your investment and enjoy the beauty of your hardwood floors for years to come.

6. Failing to Leave Expansion Gaps

Hardwood is a natural material that expands and contracts with changes in temperature and humidity. If there are no gaps left around the perimeter of the room and at transitions, the hardwood planks will have no room to expand and may buckle or warp over time.

To prevent this, it is important to leave a gap of at least 1/4 inch between the hardwood flooring and the walls or any fixed objects. This gap allows the wood to expand and contract without causing any damage to the floor.

7.  Not Using the Correct Tools or Techniques

Installing hardwood floors requires precision and attention to detail, and using the wrong tools or techniques can lead to disastrous results. This includes tools such as a tape measure, a chalk line, a miter saw, a coping saw, a pneumatic flooring nailer, and a flooring stapler. These tools are specifically designed for hardwood floor installation and will ensure that the job is done correctly.

Using the correct techniques is equally important. This includes acclimating the hardwood to the room’s humidity and temperature before installation, ensuring a level subfloor, and properly staggering the boards to create a visually appealing pattern. Failing to follow these techniques can result in buckling, warping, or gaps in the floor.

8. Skipping the Step of Sanding and Buffing

Sanding and buffing the hardwood floors before installation ensures that the surface is smooth, even, and free from any imperfections. It helps to remove any rough patches, scratches, or stains on the wood, creating a clean and flawless base for the flooring.

By skipping this step, you are compromising the overall appearance and quality of your hardwood floors. Without sanding and buffing, the imperfections and blemishes on the wood will become more apparent once the floors are installed. This can significantly diminish the aesthetic appeal of your flooring and leave you disappointed with the final result.

9. Rushing the Installation Process

One of the main issues with rushing the installation process is that it can result in improper installation. Hardwood floors require precision and attention to detail to ensure that they are properly aligned, leveled, and secured. If you rush through the process, you may end up with floors that are uneven, have gaps or buckling, or are not properly attached to the subfloor. These issues can be not only unsightly but also pose safety hazards and may require costly repairs or even replacement down the line.

Another consequence of rushing the installation process is that you may neglect important preparation steps. Before installing hardwood floors, it is crucial to properly prepare the subfloor by cleaning it, removing any existing flooring materials, and ensuring that it is level and free from moisture. Rushing through these preparation steps can result in adhesion problems, moisture damage, or even voiding the warranty on your hardwood flooring.

10. Not Hiring a Professional Installer

Professional installers have the expertise and experience to ensure that your hardwood floors are installed correctly. They have the necessary skills to handle any challenges that may arise during the installation process, such as uneven subfloors or tricky room layouts. They know the best techniques and tools to use, ensuring that your floors are properly aligned, leveled, and secure.

Additionally, professional installers have access to high-quality materials and equipment that may not be readily available to the average DIYer. They can recommend the best type of hardwood for your specific needs and budget, ensuring that you make a wise investment. They also have the expertise to handle delicate or specialty installations, such as intricate patterns or wide-plank floors.

Tri Point Flooring is a trusted provider of hardwood flooring installation services in the North Carolina Area. We provide top-notch craftsmanship and quality materials, ensuring that your floors are installed to last. Contact us today for more information!

Top 5 Benefits of Choosing Hardwood Floors for Your Home

Top 5 Benefits of Choosing Hardwood Floors for Your Home 2560 1707 Roberto

Are you considering replacing the flooring in your home? If so, you might be overwhelmed by the multitude of options available. However, one choice that stands out for its timeless beauty, durability, and versatility is hardwood floors.

In this article, we will explore the various benefits of choosing hardwood floors for your home, from their natural beauty to their durability and ease of maintenance. By the end, you’ll have a clear understanding of why hardwood floors are an excellent choice for enhancing the overall value and ambiance of your home.

1. Hardwood Floors Add Value to Your Home.

One of the major benefits of choosing hardwood floors for your home is that they add significant value to your property. Hardwood floors are highly sought after by homebuyers and are considered a luxury feature that can increase the resale value of your home.

Compared to other flooring options such as carpet or laminate, hardwood floors have a timeless appeal and provide a sense of elegance and sophistication. Potential buyers are often willing to pay a premium price for homes with hardwood floors, making it a worthwhile investment.

2. Hardwood Floors are Durable and Long-lasting.

The Benefits of Choosing Hardwood Floors for Your Home

Unlike other flooring options like carpet or laminate, hardwood floors can withstand heavy foot traffic and last for decades with proper care and maintenance.

Hardwood floors are made from high-quality, solid wood that can handle the wear and tear of everyday life. They are resistant to scratches, stains, and dents, making them ideal for homes with children or pets. Even if you accidentally drop something heavy or sharp, the chances of it causing significant damage to your hardwood floor are minimal. It could take time before you actually have to replace them.

3. Hardwood Floors Create a Timeless and Classic Look.

The beauty of hardwood floors lies in their natural warmth and character. Each hardwood plank has its own unique grain patterns, knots, and colors, making every floor one-of-a-kind. This natural variation not only adds visual interest but also adds depth and personality to your home.

Hardwood floors have been used in homes for centuries, and their popularity has remained constant throughout the years. This is because hardwood floors add a touch of elegance and sophistication to any room, whether it’s a cozy living room, a formal dining area, or a charming bedroom.

4. Hardwood Floors are Easy to Clean and Maintain.

Cleaning hardwood floors is a breeze because they do not trap dirt, dust, or allergens like other flooring options do. A simple sweep with a broom or a quick vacuuming session is usually enough to remove any surface debris. For a deeper clean, a damp mop or cloth with a mild cleaning solution can be used to quickly wipe away any stains or spills.

In terms of maintenance, hardwood floors require minimal upkeep. They do not need to be replaced or repaired as frequently as other flooring options. If scratches or scuffs do appear, they can often be easily sanded down and refinished to restore their original appearance.

5. Hardwood Floors are Versatile and Can Complement any Design Style.

Hardwood floors come in a wide range of colors, grains, and finishes, allowing you to choose the perfect option that matches your preferred design style. For a rustic or farmhouse look, you can opt for wide-planked hardwood in a distressed or hand-scraped finish. If you prefer a sleek and modern ambiance, you can select a smooth and glossy hardwood with a lighter tone.

Tri Point Flooring is the perfect place to find hardwood flooring for your home. We have a wide selection of high-quality and stylish options that will fit any budget and design preference. Discover yourself the benefits of choosing hardwood floors. Contact us today to learn more!

The Ultimate Guide: How is Hardwood Floor Installed Efficiently?

The Ultimate Guide: How is Hardwood Floor Installed Efficiently? 8000 5333 Roberto

Hardwood floors are a beautiful and timeless addition to any home. But have you ever wondered how is hardwood floor installed? If you’re considering installing hardwood floors in your own home, it’s important to understand the process and the steps involved.

Installing hardwood floors is a step-by-step process that requires careful planning and precision. Here is a breakdown of how hardwood floors are typically installed:

1. Prepare the Subfloor

How is Hardwood Floor Installed The subfloor should be clean, stable, flat, and level in order to ensure that the hardwood flooring is properly installed. If there are any signs of water damage or rot in the subfloor, it should be repaired before installation begins. The subfloor should also be free of dirt, dust, and debris. In some cases, it may be necessary to level the surface by applying a self-leveling compound. It’s also important to check for moisture levels and make sure they are within the acceptable range.

2. Acclimate the Wood

It is also important to acclimate the wood. This means that the flooring should be placed in the room where it will be installed for at least three days prior to laying it down. Acclimation helps ensure that the wood is properly adapted to the environment so that it isn’t significantly affected by changes in temperature and humidity. If the wood is not acclimated, it could expand and contract too much, causing gaps or warping.

3. Lay the Underlayment

Once the subfloor is prepped and the wood has been acclimated, it is time to lay down the underlayment. This is a thin layer of material that provides a layer of cushioning between the wood and the subfloor. It also helps to absorb any moisture in order to prevent any damage to the hardwood flooring.

4. Plan the Layout

The next step in installing hardwood floors is to plan the layout of the flooring. This involves deciding where each board will be placed, as well as determining if any special patterns or designs should be incorporated into the installation. This step is crucial in order to ensure that all pieces fit together perfectly and that there are no gaps or uneven areas. Be sure to measure twice and cut once when planning the layout.

5. Install the First Row

Once the layout has been planned, it is time to install the first row of flooring. The first row should be laid along an exterior wall in order to ensure that the boards will line up correctly. It is important to use a level and tape measure when installing this first row to make sure that it is even and straight. Once the first row is installed, it should be nailed or glued down according to the manufacturer’s instructions.

6. Continue Installation

After the first row has been installed, the next row of flooring should be placed directly next to it. Each board should be nailed or glued down according to the manufacturer’s instructions and a level should be used to ensure that each board is even and straight. As more rows are added, spacers can be used to maintain a consistent gap between each board.

7. Trim and Cut

After the flooring is installed, it will be necessary to trim and cut the boards in order to fit around obstacles such as door frames, radiators, and other fixtures. It is important to use a jigsaw or circular saw for this step-in order to ensure clean lines and accurate cuts. Once all of the boards have been trimmed, any excess pieces should be removed and disposed of.

8. Install the Last Row

The last row of hardwood flooring should be installed in the same manner as the previous rows. Once the last piece is in place, it should be nailed or glued down according to manufacturer instructions. Spacers can also be used to maintain a consistent gap between each board and ensure that the boards line up correctly. Finally, a flush cut trim saw should be used to trim off any excess material.

9. Finish the Edges

Once all of the boards have been installed, it is important to finish the edges. This can be done by using a trim saw or router to create a smooth edge along the perimeter of the flooring. Be sure to use caution when completing this step as it is easy to make mistakes that could damage your hardwood flooring. Once all of the edges have been finished, the floor is now ready to be sanded and sealed.

10. Sand and Finish

The final step in installing hardwood flooring is to sand and finish the boards. This is an important step as it will help to protect the wood and give it a beautiful, smooth finish. Before sanding, be sure to remove any debris or dirt from the flooring using a vacuum and broom. Once the surface is clean, use a belt sander to sand the boards until they are smooth. Once the boards have been sanded, they should be sealed according to manufacturer instructions.

If you are still unsure on the answer to the question, “how is hardwood floor installed”, Tri Point Flooring is your trusted source. Our experienced installers have years of experience and will ensure that your hardwood floors are installed correctly and with precision. Contact us today to learn more about our services.

Top 10 Helpful Tips for Maintaining and Caring for Hardwood Floors

Top 10 Helpful Tips for Maintaining and Caring for Hardwood Floors 2560 1707 Roberto

Hardwood floors are a beautiful and timeless addition to any home. However, they require regular maintenance and care to keep them looking their best. If you want to ensure the longevity and beauty of your hardwood floors, then you need to know the top tips for maintaining and caring for them. In this article, we will share the top tips for maintaining and caring for hardwood floors, so you can enjoy their beauty and durability for years to come.

1. Clean and Sweep Hardwood Floors Regularly.

Top 10 Tips for Maintaining and Caring for Hardwood Floors

Cleaning and sweeping hardwood floors regularly are among the most important steps in preserving the beauty of these floors. Regular cleaning and sweeping help remove dirt, dust, and debris that can scratch and dull the surface of your hardwood floors. It is recommended to sweep, or dust mop your floors at least once a day or as needed, depending on the amount of foot traffic in your home.

When sweeping, use a soft-bristle broom or a microfiber dust mop to gently remove loose dirt and dust. Avoid using vacuums with beater bars or hard bristle attachments, as they can cause scratches on the surface of your floors. In addition to regular sweeping, it is important to clean your hardwood floors using the appropriate cleaning products. Avoid using harsh chemicals or abrasive cleaners, as they can damage the finish of your floors. Instead, opt for a pH-neutral hardwood floor cleaner that is specifically designed for use on hardwood surfaces.

2. Choose and Place the Right Furniture.

Go for furniture with soft padding or felt pads on the bottom of the legs. This will prevent scratches and minimize the impact on your hardwood floors. Avoid furniture with metal or hard plastic feet, as they can easily scrape and leave marks on the floor. Also make sure that the furniture is not too heavy for the floor, which can cause dents and other damage.

In addition to choosing the right furniture, proper placement is also crucial. Avoid dragging or sliding furniture across your hardwood floors, as this can cause scratches and wear down the finish. Instead, lift the furniture when moving it and use furniture sliders or mats to protect your floors.

3. Use Area Rugs and Mats to Protect Your Floors.

Area rugs and mats act as a barrier between your hardwood floors and the outside elements. They can trap dirt, debris, and moisture that may otherwise be tracked onto your floors, causing damage over time. By placing a mat at the entrance of your home or in front of frequently used doors, you can prevent dirt and moisture from being brought onto your hardwood floors.

In addition to protecting against dirt and moisture, area rugs and mats also provide cushioning and support. They can absorb the impact of footsteps and furniture, reducing the risk of scratches and dents on your hardwood floors. When choosing area rugs and mats, opt for ones with non-slip backings to ensure they stay in place and do not cause any accidents.

4. Choose the Right Shoes for Your Floors.

Avoid shoes with heels or hard soles. High heels can dig into the wood and leave unsightly marks, while hard-soled shoes can cause scratches and dents. Choose shoes with rubber or soft-soled bottoms instead. These types of shoes provide better traction and are less likely to cause any damage to your floors.

Another important factor to consider is the cleanliness of your shoes. Make sure to keep your shoes clean and free from any dirt or debris that could be tracked onto your hardwood floors. Small rocks, sand, or dirt particles can act like sandpaper, scratching the surface of your floors with every step. Regularly clean the soles of your shoes and remove any dirt before walking on your hardwood floors.

5. Keep Pets’ Nails Trimmed for Hardwood Floor Protection.

Long nails can easily scratch and gouge the surface of your hardwood floors, leaving unsightly marks that are difficult to repair. Regularly trimming your pets’ nails will prevent these scratches from occurring in the first place. It is recommended to trim your pets’ nails every 4-6 weeks, or as needed based on their individual nail growth.

In addition to preventing scratches, trimmed nails also provide better traction for your pets. Long nails can cause pets to slip and slide on hardwood floors, which can lead to accidents and injuries. By keeping their nails at an appropriate length, you can ensure their safety and prevent any unnecessary accidents.

6. Limit Sun Exposure.

To limit sun exposure, you can start by using curtains, blinds, or shades to block direct sunlight from entering the room during peak hours of the day. This will help reduce the amount of UV rays that reach your floors and minimize the risk of fading.

Additionally, you can consider applying UV-protective film or tint to your windows. These films can help filter out harmful UV rays while still allowing natural light to enter the room. They are easy to install and can provide long-lasting protection for your hardwood floors.

7. Protect Your Floors Against Moisture and Water Damage.

Moisture can be damaging to wood floors, causing warping, cupping, buckling, and discoloration. To protect your hardwood floors from water damage, make sure to keep moisture levels low in your home. This can be done by using a dehumidifier or air conditioner and keeping the area around the floors dry and free from spills or leaks.

In addition to controlling moisture levels, it’s also important to clean up water quickly if any spills occur. Blot up excess water with a cloth and use a vacuum cleaner to remove any standing liquid. Also make sure to check for and repair any leaks or cracks in your foundation that may allow moisture into your home.

8. Refinish and Seal Your Hardwood Floors as Needed.

Giving your hardwood floors the proper care and maintenance is essential for keeping them looking beautiful for many years to come. One important part of caring for your hardwood floors is having them refinished and sealed as needed. Refinishing and sealing are both processes that help to protect the wood from scratches, stains, and other damage while also adding a layer of shine.

Refinishing involves sanding down the top layer of wood and then reapplying a fresh coat of sealant. Sealing helps protect the hardwood from daily wear and tear, as well as moisture. Have your floors professionally refinished and sealed every few years to ensure they remain in great condition for years to come.

9. Inspect for Signs of Damage and Address Them Promptly.

Your hardwood floors are a great addition to your home, but they require regular maintenance and care in order to stay looking their best. One of the most important things you can do is regularly inspect for signs of damage and address them promptly. If left unchecked, even minor damage can become serious and expensive to repair. When inspecting your hardwood floors, look for signs of scratches, dents, or discoloration. If you find any damage, contact a professional hardwood flooring specialist to assess the situation and determine the best course of action.

10. Hire Professionals for Maintenance and Refinishing.

While some simple cleaning tasks can be done at home with minimal effort, investing in professional help when it comes to maintenance and refinishing your hardwood floors is the best way to ensure that they remain in excellent condition for years.

When it comes time to have your hardwood floors refinished and resealed, hire a professional who is experienced in the task. They can inspect for signs of damage, suggest any necessary repairs, and help you choose the right products and techniques to ensure your floors look their best.

Tri Point Flooring is a great option for those in the Wake County looking for professionals who can help with maintaining and caring for hardwood floors. Give us a call today to learn more about what we offer!

What is The Difference Between Engineered and Solid Hardwood Floors?

What is The Difference Between Engineered and Solid Hardwood Floors? 2560 1707 Roberto

Are you considering installing hardwood floors in your home, but you’re unsure whether to choose engineered or solid hardwood? Well, you’re not alone. Many homeowners struggle with this decision, as both options have their pros and cons. But fear not, because in this article, we will break down the difference between engineered and solid hardwood floors, helping you make an informed decision that best suits your needs and preferences.

What is the Main Difference Between Engineered and Solid Hardwood Floors?

When it comes to choosing between engineered and solid hardwood floors, it’s important to understand the main differences between the two. While both options provide the beauty and warmth of real wood, they have distinct characteristics that set them apart.

1. Construction

Solid hardwood floors are made from a single piece of solid wood. Each plank is typically made from a hardwood species, such as oak, maple, or cherry, and is milled to a specific thickness. The planks are then installed by nailing or stapling them to a subfloor. Solid hardwood floors are known for their durability and longevity, and they can be sanded and refinished multiple times to restore their original beauty.

On the other hand, engineered hardwood floors are constructed using multiple layers of wood. The top layer, also known as the wear layer, is made from a hardwood veneer. This layer gives engineered hardwood its authentic appearance and can be made from various wood species. Beneath the wear layer, there are several layers of plywood or high-density fiberboard (HDF) that are stacked in a cross-grain pattern.

2. Installation Method

Solid hardwood floors are typically installed using the nail-down method. This involves nailing each individual plank directly to the subfloor. This installation method requires a plywood or wooden subfloor and is not suitable for concrete or radiant heating systems. The nail-down method provides a secure and stable installation, but it can be more time-consuming and labor-intensive.

On the contrary, engineered hardwood floors offer more flexibility in terms of installation methods. They can be installed using the nail-down method, similar to solid hardwood, but they also offer additional options such as glue-down and floating installations.

3. Durability

Solid hardwood floors are known for their exceptional durability. They can withstand heavy foot traffic and are less prone to scratches and dents compared to engineered hardwood floors. With proper maintenance and care, solid hardwood floors can last for generations and can be sanded and refinished multiple times to restore their original beauty.

Engineered hardwood floors offer good durability as well, but not to the same extent as solid hardwood floors. The top layer of engineered hardwood is made from real wood, providing a natural and authentic appearance. However, the lower layers are made from plywood or high-density fiberboard (HDF), which may not be as durable as solid wood.

4. Cost

The Difference Between Engineered and Solid Hardwood Floors Solid hardwood floors tend to be more expensive upfront compared to engineered hardwood floors. This is primarily due to the difference in construction and the quality of materials used.  The manufacturing process is more intricate, and the higher quality of wood used contributes to the higher cost.

Conversely, engineered hardwood is made up of several layers of wood, with a top layer of real hardwood veneer and lower layers of plywood or high-density fiberboard (HDF). This construction method allows for greater stability and resistance to moisture, making it a more cost-effective option. The use of less expensive materials in the lower layers helps to reduce the overall cost of engineered hardwood.

5. Aesthetics

Solid hardwood floors have a timeless and traditional appeal. They are made from a single piece of solid wood, which gives them a rich and authentic look. The natural variations in grain patterns, color, and texture create a unique and warm atmosphere in any room. Solid hardwood floors can be sanded and refinished multiple times, allowing you to change the stain or finish to match your evolving style preferences.

As compared to solid hardwood floors, engineered hardwood floors offer a wider range of options when it comes to aesthetics. They consist of multiple layers of wood, with a top layer of real hardwood veneer. Engineered hardwood is available in various wood species, finishes, and plank sizes, allowing for greater versatility in design.

Is Maintenance and Care Also Important in Choosing Between the Two?

Yes, maintenance and care are also important factors to consider when choosing between engineered and solid hardwood floors. While both types of flooring require regular upkeep to ensure their longevity and beauty, there are some differences in the maintenance requirements.

Solid hardwood floors are more susceptible to moisture and temperature changes, which can cause the wood to expand or contract. As a result, they require more stringent maintenance measures to prevent warping or cupping. It is crucial to avoid excessive moisture exposure and to promptly clean up any spills to prevent damage to the wood.

On the other hand, engineered hardwood floors are more resistant to moisture and temperature fluctuations due to their layered construction. This makes them a better choice for areas with high humidity or below-grade installations. While engineered hardwood floors still require regular cleaning and maintenance, they are generally more forgiving when it comes to moisture-related issues.

What should you choose between the two?

When it comes to choosing between engineered and solid hardwood floors, there are a few factors to consider. Both options have their own advantages and disadvantages, so it ultimately depends on your personal preferences and needs.

To decide which option is right for you, consider factors such as the location of the flooring, the level of foot traffic, and your budget. If you are installing the flooring in a basement or a bathroom where moisture is a concern, engineered hardwood floors may be the better choice. However, if you prioritize durability and the ability to refinish the floors in the future, solid hardwood floors may be the way to go.

Ultimately, the decision between engineered and solid hardwood floors depends on your specific needs and preferences. Take the time to research and compare the options, and consult with a flooring professional if needed, to ensure that you make the right choice for your home.

If you need help deciding between engineered and solid hardwood floors, Tri Point Flooring is here to help. Our experienced professionals can provide you with the information and advice you need to make the best decision for your home. Contact us today to get started.

How to Choose the Best Finish for Your Hardwood Floors

How to Choose the Best Finish for Your Hardwood Floors 2560 1440 Roberto

Are you in the process of renovating your home or installing new hardwood floors? If so, one important decision you’ll need to make is to choose the best finish for your hardwood floors. With so many options available, it can be overwhelming to determine which finish is best for your hardwood floors. Whether you’re a first-time homeowner or a seasoned home renovation enthusiast, read on to discover the secrets to choosing the perfect finish for your hardwood floors.

What Should You Understand About the Different Types of Hardwood Floor Finishes?

How to Choose the Best Finish for Your Hardwood Floors

When it comes to choosing the right finish for your hardwood floors, understanding the different types of finishes available is crucial. Each type of finish has its own unique characteristics and benefits. Here are a few key things you should understand about the different types of hardwood floor finishes:

1. Polyurethane Finish

This is the most common type of finish used on hardwood floors. It comes in two varieties: oil-based and water-based. Polyurethane finishes provide a durable and protective layer that helps to resist scratches, stains, and moisture. They also come in different sheen levels, ranging from glossy to matte.

2. Wax Finish

Wax finishes offer a traditional and natural look to hardwood floors. They provide a soft, low-sheen appearance and can be easily maintained by reapplying wax periodically. However, wax finishes are not as durable as polyurethane finishes and may require more frequent maintenance.

3. Oil Finish

Oil finishes penetrate into the wood, enhancing its natural beauty and providing a matte or satin sheen. They are typically made from natural oils and waxes, offering a more environmentally friendly option. Oil finishes require regular maintenance and reapplication to keep the wood protected and looking its best.

4. UV-Cured Finish

This type of finish is cured instantly using ultraviolet light. It provides a strong and durable protective layer that is resistant to scratches and fading. UV-cured finishes are commonly used in commercial settings due to their fast-curing time and high durability.

5. Varnish Finish

Varnish finishes are similar to polyurethane finishes but tend to have a higher gloss level. They offer excellent protection against wear and tear, making them a popular choice for high-traffic areas. Varnish finishes can be oil-based or water-based, providing options for different preferences and environmental considerations.

What are the Factors to Consider When Choosing a Finish for Different Wood Species?

When choosing a finish for your hardwood floors, it’s important to consider the specific wood species you are working with. Different wood species have unique characteristics that can affect how a finish will look and perform. Here are some factors to consider when choosing a finish for different wood species:

1. Wood grain and color

Each wood species has its own distinct grain pattern and color. Some species, like oak or hickory, have pronounced grain patterns, while others, like maple or birch, have a more subtle grain. The finish you choose should enhance and highlight the natural beauty of the wood’s grain and color.

2. Hardness and durability

Some wood species, such as oak or walnut, are naturally harder and more durable than others. If you have a high-traffic area or expect your floors to endure heavy wear and tear, you’ll want to choose a finish that provides superior protection and durability.

3. Gloss level

The gloss level of a finish refers to its shine or sheen. Different wood species can look different with varying levels of gloss. For example, a high-gloss finish may enhance the richness of a dark wood species, while a matte or satin finish may be more suitable for a lighter wood species.

4. Maintenance and upkeep

Consider the level of maintenance and upkeep required for different finishes on different wood species. Some finishes may require more frequent reapplication or special care to maintain their appearance and protect the wood.

5. Personal preference

Ultimately, your personal taste and style should play a role in choosing a finish for your hardwood floors. Consider the overall aesthetic you want to achieve in your space and choose a finish that aligns with your vision.

Should You Seek Professional Advice and Recommendations for the Finish of Your Hardwood Floors?

When it comes to choosing the right finish for your hardwood floors, seeking professional advice and recommendations can be incredibly helpful.

While there are plenty of resources available online and in home improvement stores, consulting with a professional in the field can provide you with expert insights and ensure that you make the best decision for your specific flooring needs.

One of the main benefits of seeking professional advice is the knowledge and experience that these experts bring to the table. They have a deep understanding of different types of finishes, their application processes, and how they will interact with your specific hardwood flooring. They can assess the condition of your floors, take into consideration factors like foot traffic, pets, and humidity levels, and recommend the most suitable finish for your needs.

Additionally, professionals can provide you with personalized recommendations based on your preferences and desired outcome. They can guide you through the various options available, such as oil-based finishes, water-based finishes, or polyurethane finishes, and explain the pros and cons of each. They can also help you determine the level of sheen or gloss that will best complement your décor and lifestyle.

Another advantage of seeking professional advice is that they can save you time and money in the long run. By avoiding costly mistakes or selecting the wrong finish, you can prevent the need for reapplication or refinishing sooner than necessary. Professionals can also provide you with tips on how to properly maintain and care for your finished hardwood floors, ensuring their longevity and durability.

Ultimately, while it is possible to research and choose a finish for your hardwood floors on your own, the expertise and guidance of a professional can make a significant difference in achieving the desired outcome. Their knowledge, personalized recommendations, and potential cost savings make seeking professional advice a worthwhile investment when it comes to selecting the right finish for your hardwood floors.

Tri Point Flooring has a team of experienced professionals can offer you comprehensive advice and guidance on the best finishes for your specific flooring needs. Contact us today to learn more.

The Cost of Hardwood Floor Installation: What to Expect

The Cost of Hardwood Floor Installation: What to Expect 2560 1703 Roberto

Hardwood floors are a timeless and elegant addition to any home. However, the cost of installation can often be a deterrent for homeowners considering this upgrade. If you’re wondering what to expect when it comes to the cost of hardwood floor installation, you’re in the right place.

The Cost of Hardwood Floor Installation

Whether you’re looking to transform your living room or upgrade your entire home, read on to discover the factors that influence the cost of hardwood floor installation and gain valuable insights into what you can expect to pay for this stunning home improvement project.

What are the Factors that Determine the Cost of Hardwood Floor Installation?

There are several factors that determine the cost of hardwood floor installation. Understanding these factors can help you better estimate and plan for the expenses involved in installing hardwood floors in your home.

1. Type of hardwood

The type of hardwood you choose will have a significant impact on the overall cost. Different types of hardwood have varying prices per square foot. Exotic hardwoods, such as Brazilian cherry or mahogany, tend to be more expensive than domestic hardwoods like oak or maple.

2. Quality and grade of hardwood

Within each type of hardwood, there are different grades and qualities available. Higher-quality and grade hardwood will typically cost more. Factors like the finish, texture, and durability of the hardwood will influence the price.

3. Area to be covered

The size of the area where the hardwood floor will be installed is another crucial factor. Larger areas will require more materials and labor, resulting in higher installation costs. Additionally, irregularly shaped rooms or areas with many corners and angles may require more precise cutting and installation, which can increase the overall cost.

4. Subfloor condition

The condition of the existing subfloor can impact the cost of installation. If the subfloor needs repairs or leveling before the hardwood can be installed, it will add to the overall cost. Similarly, removing old flooring materials, such as carpet or tile, may also increase the cost.

5. Installation method

There are different installation methods for hardwood floors, including nail-down, glue-down, or floating. Each method has its own requirements and associated costs. Nail-down installation tends to be the most common and cost-effective method, while glue-down or floating installations may be more expensive.

6. Additional features and customization

If you want to add extra features or customize your hardwood floor, such as inlays, borders, or unique patterns, it will increase the cost. These additional features require more labor and expertise, which will be reflected in the overall price.

7. Location and accessibility

The location of your home and its accessibility can also affect the cost. If your home is in a remote area or has limited access, it may require additional transportation and labor costs.

What are the Additional Costs to Consider for Hardwood Floor Installation?

When planning for hardwood floor installation, it’s important to consider the additional costs that may arise. While the cost of materials and labor are the main expenses, there are several other factors that can contribute to the overall cost of the project.

One additional cost to consider is the removal and disposal of the existing flooring. If you have carpet, laminate, or tile flooring that needs to be removed before installing hardwood, this can add to the total cost. The cost of removal will depend on the size of the area and the type of flooring being removed.

Trim and molding are also additional costs to consider. The cost of trim and molding will depend on the type of material and the complexity of the installation.

Lastly, it’s important to consider the cost of any additional services or upgrades you may want for your hardwood floor installation. This could include things like staining or sealing the hardwood, adding in-floor heating, or installing a moisture barrier.

How Can You Budget for Hardwood Floor Installation?

Budgeting for hardwood floor installation is an essential step to ensure that you can afford this home improvement project. By carefully planning and estimating the costs involved, you can avoid any financial surprises along the way. Here are some key steps to help you budget for hardwood floor installation.

1. Research the Average Costs

Start by researching the average costs of hardwood floor installation in your area. Prices can vary depending on factors such as the type of hardwood, the size of the area to be covered, and the complexity of the installation. Look for reliable sources such as local contractors or online resources to get a general idea of the cost range.

2. Measure the Area

Measure the area where you plan to install hardwood flooring. This will help you determine the quantity of materials needed, such as hardwood planks, underlayment, and adhesive. Knowing the exact measurements will also allow you to get accurate quotes from contractors or suppliers.

3. Consider Additional Expenses

In addition to the cost of materials, there might be other expenses to consider. These can include labor costs if you plan to hire professionals for the installation, delivery fees for the materials, removal and disposal of existing flooring, and any necessary repairs. Make a list of all potential expenses to get a comprehensive budget estimate.

4. Get Multiple Quotes

Reach out to different contractors or suppliers and request quotes for the hardwood floor installation. Be clear about the specifications of the project and ask for a breakdown of costs. Comparing multiple quotes will help you find the best deal and identify any significant price differences that may require further investigation.

5. Set a Contingency Fund

It’s always wise to set aside a contingency fund when budgeting for home improvement projects. Unexpected issues or changes during the installation process can arise, requiring additional expenses. Aim to allocate around 10-20% of your total budget as a contingency fund to ensure you’re prepared for any unforeseen circumstances.

6. Prioritize and Plan

If your budget is limited, consider prioritizing certain areas or rooms for hardwood floor installation. You can start with high-traffic areas or rooms that will have the greatest impact on your home’s aesthetics. This way, you can still achieve your desired outcome while staying within your budget constraints.

Tri Point Flooring is a leading provider of hardwood flooring services in North Carolina. We specialize in the installation and refinishing of hardwood floors, providing top-notch results at competitive prices. Contact us today to learn more about our services and get a free quote!

Choose Wood Flooring • Details to Help You Decide

Choose Wood Flooring • Details to Help You Decide 999 665 Roberto

When you need to choose wood flooring for your home, it is easy to lose yourself in the number of options. You also have multiple considerations to think about, depending on each room’s traffic and use. Below, we look at the five most popular wood flooring materials and the pros and cons of each.

Wood Flooring

Nothing is as classic as hardwood flooring. It is durable, natural and warm. It is also suited to a wide range of decors, thanks to the many woods and finishes available on the market today. Because hardwoods last so long and are easily refinished by the pros, you cannot go wrong if you choose wood flooring.

Where things get difficult is in making your final selections from oak, cherry, or other species. You also need to decide upon your plank style, parquet, or other designs. Will you install your own prefinished planks or have the pros do the work for you? To choose wood flooring made of real hardwood, it is usually best to seek advice from the experts at TriPoint Flooring for your Raleigh area home.

Luxury Vinyl Planks

If you want to choose wood flooring that most closely resembles natural hardwoods, but is less expensive, today’s luxury vinyl plank flooring is your best option.

Luxury vinyl planks consist of wood-based materials topped with a vinyl photographic image of your ideal hardwood species, then a protective finish. This means you get the beauty of hardwoods with the durability of vinyl flooring. It can stand up to the everyday demands of pets, children and other heavy traffic. On the downside, your senses notice the difference between luxury vinyl planks and real wood. LVP flooring does not feel or sound like real wood when you walk across them.

Engineered Hardwood Floors

Between natural hardwoods and luxury vinyl planks are engineered hardwood floors. Engineered hardwoods are made of several layers of plywood topped with a real hardwood veneer. They cost a bit more than luxury vinyl planks. But they have the authentic sound, look and feel of real hardwoods that vinyl planks do not.

If you want to choose wood flooring for its authentic look and feel, but do not want the higher price tag of natural hardwoods, engineered hardwood floors are a great option. They enable you to have floors with all of the traditional wood appeal, but on a budget. Even better, the pros can refinish your engineered hardwoods for an update at some point in their lifetime. This is an option not available for luxury vinyl planks.

Bamboo Flooring

Many people looking to choose wood flooring think bamboo is a real wood option. But this flooring is not from a tree. Instead, it is a woody grass. Still, it is a natural choice that offers exceptional strength, durability and resistance to climate issues like swelling or contraction from humidity. In fact, bamboo has strength equivalent to steel.

As you choose wood flooring options, consider bamboo. These floors are pre-finished and engineered. The planks offer tongue-and-groove joints, making them as easy to install as standard engineered hardwoods. But bamboo forests only take up to five years to reach maturity as compared to hardwood forests requiring 120 years on average. This means that bamboo flooring is far more sustainable and environmentally friendly.

Cork Flooring

Like bamboo, cork is an environmentally-friendly option for people trying to choose wood flooring for their Raleigh area home. But unlike hardwood, cork feels cushioned underfoot. This woody material has a honeycomb cellular makeup that, besides being soft to stand on, absorbs sound and vibrations. It can actually make loud spaces quieter.

Cork flooring is also easy to install. It comes in pre-finished, nonslip tiles ideal for any room, even wet ones like the kitchen or bathroom. You can choose wood flooring made of cork in a wide range of finishes, too.

Tri Point Flooring Will Help You Choose Wood Flooring

The experts at Tri Point Flooring in Cary, NC will help you choose wood flooring to ensure you make the decisions that best suit your home, lifestyle and décor. We can make the whole process less intimidating and easier. Call us today at (919) 771-7542 for a free in home consultation.

4 Approaches To Refresh Your Hardwood Floors

4 Approaches To Refresh Your Hardwood Floors 1000 682 Roberto

Are your hardwood floors looking dull and scuffed? These signs of everyday use are bound to occur in even the tidiest of households. In fact, you likely enjoy having hardwoods because of their durability and how they stand up to decades of foot traffic. But at some point in time, even the best maintained flooring needs a facelift. Below, we explore the best methods to refresh your hardwood floors and make them look newer again.

Obviously, your best approach to make your hardwood floors look new longer is to properly maintain them from the start. When your hardwoods are installed or refinished by Tri Point Flooring, we are happy to provide tips for keeping your floors looking their best.

Refresh Your Hardwood Floors Via:

  • Thoroughly Cleaning
  • New Topcoat
  • Buff & Polish
  • Completely Sand Down & Refinish

Give Your Hardwood Flooring A Deep Cleaning

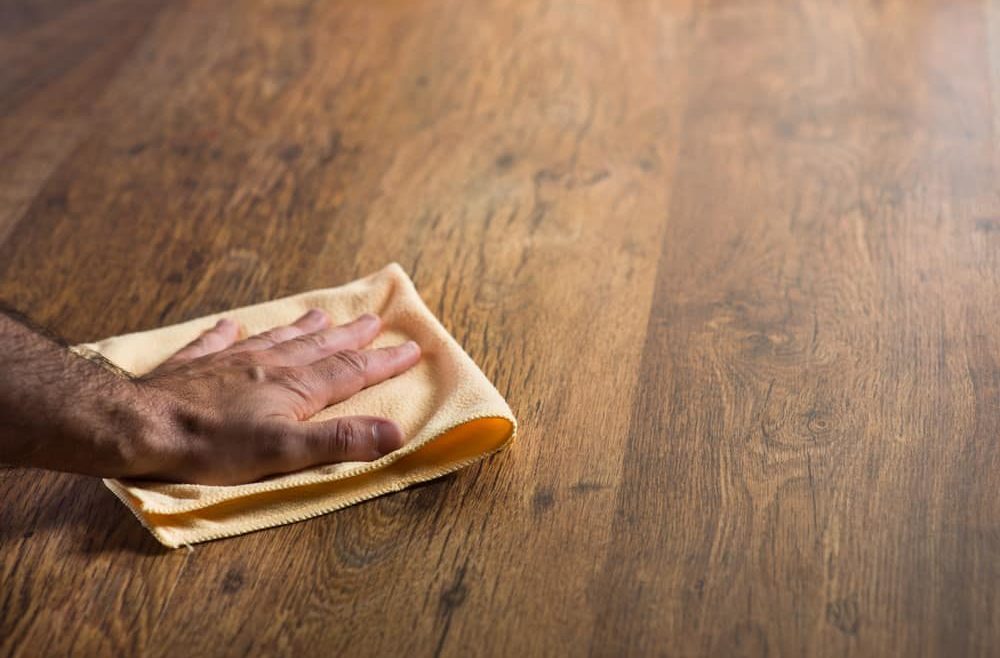
A thorough cleaning is one of the best ways to refresh your hardwood floors. To be thorough, such a cleaning involves removing all of the furniture and rugs from the room. Of course, you should never drag furniture or textiles across the floor. Doing so can scratch, scuff or dull your floor’s finish.

A good vacuuming will pick up loose dirt, dust and debris. After vacuuming, use a hardwood floor cleaner made specifically for floors like yours. It is important to note that damp mopping or wet mopping with water will damage your hardwood floor finish. Many people think that mopping is key to make your hardwood floors look new again. But instead, doing so adds a haze to the finish.

New Topcoat Could Be A Game Changer

When merely cleaning will no longer make your hardwood floors look new again, you need a better solution. Your next go-to method to refresh your hardwood floors is application of a fresh topcoat. Your Tri Point Flooring pros can quickly and easily provide a new finish for your hardwood floors to roll back time and make them look their best.

If you feel the urge to DIY this project, you will have some work to do. First remove the floor finish using extra-fine steel wool. After sweeping away the residue, use a fine brush to apply a fresh finish. You need to also wipe away excess finish before allowing it to dry. Finally, after the finish dries, use a soft, lint-free cloth to buff and make your hardwood floors look new again.

It is important to note that doing this work yourself can certainly refresh your hardwood floors. But if the flooring and its finish are under warranty, doing so on your own will void the policy. It is generally better to call upon the experts to do this work for you if you have recently installed hardwood floors or engineered hardwoods.

Buff and Polish Technique to Refresh Your Hardwood Floors

If you want to try an easier and less laborious method to refresh your hardwood floors instead of replacing the finish, consider the buff and polish technique. You can choose to rent or buy your own buffer machine and buffing pads if you have many rooms of hardwoods and want to do-it-yourself. Or you can call upon the pros of Tri Point Flooring to do this work for you.

The first step in buffing hardwood floors is to thoroughly clean dirt, dust and debris from the surfaces. Even the tiniest of debris can scuff or scratch your floors during the buffing process. Before buffing, apply polish to small sections of the floor. Then work this polish in with the buffer in circular movements from one part of the room to the next. Again, if your hardwood floors are under factory warranty, doing the work yourself will void that coverage.

Sand and Refinish to Totally Refresh Your Hardwood Floors

If you want to totally turn back the hands of time on your hardwoods, sanding and refinishing will do the trick. You can even change the stain or finish as part of this process, for a whole new look. But this is not a DIY project. Most people need to hire the pros like those of Tri Point Flooring to do this work for them.

If you want to refresh your hardwood floors, call upon the experts of Tri Point Flooring. Our pros can assess your wood surface and finish quality and determine which method can make your hardwood floors look new again. Call us at (919)771-7542 for appointment scheduling.

Are Hardwood Floors Energy Efficient?

Are Hardwood Floors Energy Efficient? 1000 508 Roberto

If there is one reliable fact in this world, it is that the costs of energy will only keep rising. Homeowners certainly know this fact well as prices have risen significantly in the past 20 years and will keep doing so. Which is why it is very important to maintain energy efficient homes. Even when these costs temporarily drop, they inevitably rise again in summer months for cooling and wintertime for heating. With hardwood flooring being one of the top features home buyers look for in their next residence, many wonder, “Are hardwood floors energy efficient?”

While no type of flooring will substantially cut your energy costs, there are ways to improve home comfort and enhance energy efficiency with these surfaces. Below are some tips for that as well as to answer that question of, “Are hardwood floors energy efficient?”

Enhance Energy Savings through Draft-Proofing

Draft-proofing is one of the best ways to answer, “Are hardwood floors energy efficient?” You can save between $25 and $40 per year through this tactic. Couple draft-proofing with other methods likes turning off lights, appliances and electronics when you are not using them and your energy bills will decrease slightly.

Draft-proof for energy efficiency by installing door sweeps at the base of each door in your home. These sweeps block drafts, whether from the outdoors or inside draftiness. They can help each room retain its own heat or cooling to cut down on lost energy and your ultimate heating or air conditioning costs.

Another draft-proof method is use of area rugs to keep your rooms warmer. Area rugs also help with acoustics, keeping sounds from bouncing from the hard surfaces.

Fill Gaps In Your Hardwood Flooring to Make it More Energy Efficient

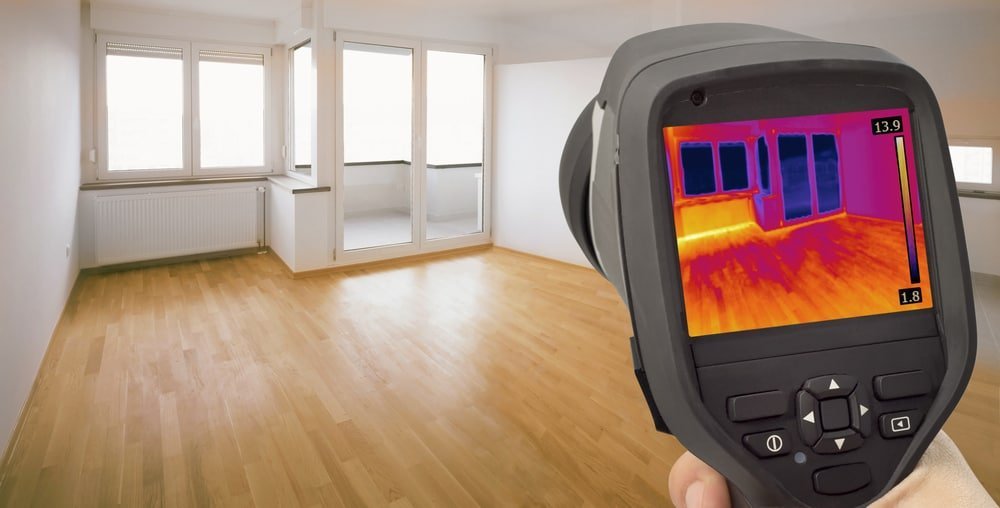
Filling gaps in your hardwood floors is another great tip to answer, “Are hardwood floors energy efficient?” You can save between $75 and $90 each year on your energy bills if your wood floors and skirting have good insulation. Of course, old hardwood floors typically have gaps. Suspended wood floors typically have no insulation, as well.

Hardwood flooring needs space to expand and contract according to environmental conditions. This is why you should never fill every gap. But after ensuring your flooring has a good expansion gap around the perimeter, you can fill drafty gaps. This is true for even historic hardwood floors.

To fill gaps in your hardwood flooring, use a natural resin filler mixed with sawdust from stained wood of the same species. This color matching will prevent visible flaws. Of course, you can also call upon your hardwood flooring pros at Tri Point Flooring in the Raleigh area to do this work for you. After filling your floor gaps, your floor feels less drafty and offers better energy efficiency.

Ensure Your Hardwood Floors Are Insulated

Insulation’s primary purpose is to provide energy efficiency, sound absorption or both. In the case of hardwood flooring, insulation fulfills both objectives. When you want to install new hardwood floors, it is important to ensure you first install an insulating underlay over the concrete foundation or other subfloor.

It is important to note one issue related to insulating your hardwood floors, however. If the room is above a heated room, not insulating the floor enables heat to rise from the lower room into the upper one. This can actually reduce your energy costs. For a second-floor room with hardwood flooring over an unheated space like a garage, insulation is the right choice.

In this answer to “are hardwood floors energy efficient,” floor insulation can save you about $45 to $90 per year, depending on the structure and size of your home.

Heat Your Hardwood Floors

Part of the answer to “are hardwood floors energy efficient” comes from custom features, such as whether you have under-floor heating. An under-floor heating system lies beneath the hardwood flooring to keep the surfaces toasty underfoot. Because heat rises, these systems also help heat the entire space in which you have wood floors. Obviously, this is a choice you have to make when installing your new floors. It also requires an upfront investment for a long-term savings on your energy bills.

Additionally, under-floor heating works best under engineered hardwood floors, not natural hardwoods. This is because the heat and cool-down effects cause natural hardwoods to expand and contract. Engineered hardwoods will not buckle, warp or cup under these conditions.

Make Your Hardwood Floors the Most Energy Efficient They Can Be

If you have questions like “are hardwood floors energy efficient,” talk to your Raleigh area professionals at Tri Point Flooring. We enjoy helping our current and new customers get the most from their hardwood floors. We will also help you select the best flooring for your home’s ideal energy efficiency and aesthetic appeal. Call us today at (919) 771-7542.

    Our Service Area Includes:

    Cary NC
    Raleigh NC
    Apex NC
    Chapel Hill NC


    Hours of Operation:

    Monday • 8:00am-6:00pm
    Tuesday • 8:00am-6:00pm
    Wednesday • 8:00am-6:00pm
    Thursday • 8:00am-6:00pm
    Friday • 8:00am-6:00pm


    *** We Offer Free Quotes For All Projects Over 500 Square Feet